Digital Asset Management (DAM) is crucial to modern business, as it provides a centralized platform to manage, organize, and distribute digital assets like images, videos, audio, and other multimedia content. However, if you’re still relying on an outdated or inadequate DAM system, you’re missing out on the benefits of a more efficient and frankly, more cost efficient alternative to managing and sharing your files.
In this post, we’ll explore an effective but also budget conscious approach to creating a sudo-DAM system to improve process and accessibility in organizations of every size. Grab your corporate card and throw away the budget approval sheet. This is only going to cost us about fifteen bucks a month.
What you’ll need:
Google Drive Account - in the provided example, we’re working with the installed desktop version of Google Drive with the Standard 200GB Plan ($2.99/mo.)
Figma - in the provided example, we’re working with the Figma Professional Plan ($12/mo.)
A large cup of coffee - because who doesn’t like coffee?!
Before we dive into the deep end, let’s get our feet wet with the background on each of the tools. Figma is a cloud-based design tool used to create user interfaces, prototypes, and design systems. It allows teams to collaborate in real-time and offers a range of features such as vector editing, prototyping, and commenting. We'll be using Figma as our primary source for content creation and final content review.
Google Drive is a cloud-based file storage and synchronization service that allows users to store and access files from anywhere. It includes a suite of productivity tools such as Google Docs, Sheets, and Slides for collaborative editing and sharing. We'll be using Google Drive as our primary location for storing all raw files and original content. Now that you have a better understanding of the tools, let’s get started.
Building Your DAM:
After installing and setting up your Google Drive account, you want to start by creating a new folder template. The folder structure will help with organization as you continue to scale.
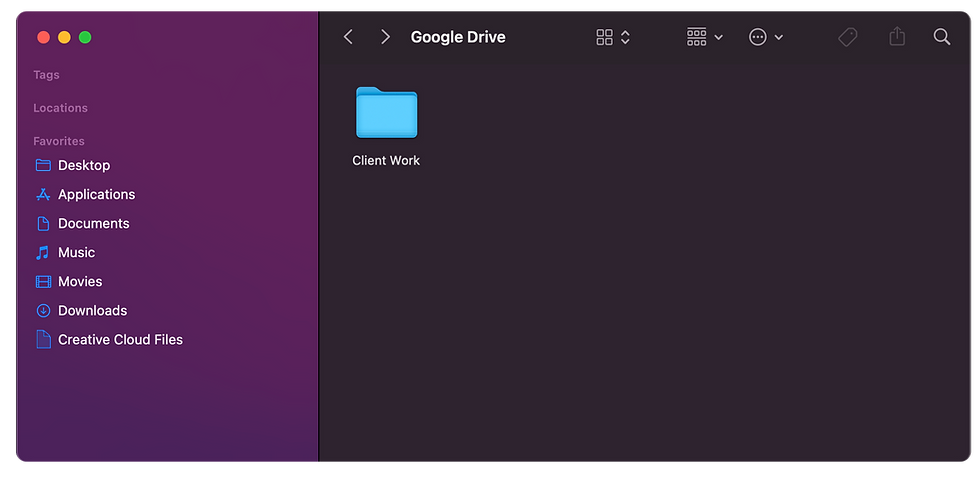
You want to create a new folder and name the folder ‘Client Work’. In the ‘Client Work’’ folder you want to create another folder named ‘Duplicate_Me’. You’ve officially completed Step 1 in your journey of building your internal DAM. Now, let’s keep going.

In the ‘Duplicate_Me’ folder, you want to create three folders - Assets, Files, Renders. In your ‘Assets’ folder, you want to create three more folders - AI_Vector, Media, Images. (We know, it’s a ton of folders - but trust us, it’s gonna be amazing). Also, if these recommended labels don’t align with your projects, feel free to create an alternate structure. In this example:
Assets - This folder is dedicated to hosting all non-original work received from the client; This includes previous assets, inspirations, and sketches -
AI_Vector - hosts all .eps and .ai files received from the client
Media - hosts all multimedia files received from the client (e.g.mov, mp4)
Images - hosts all static files received from the client (e.g. jpg, png)
Files - This folder is dedicated to hosting all working files including file variations produced to complete the project
Renders - This folder is dedicated to hosting all final files ready for client download, social sharing and public distribution


Now that you’ve built your folder structure, let’s head back to the Google Drive homepage and add a project to our Drive. Let's start by duplicating our ‘Duplicate_Me’ folder with a singular click and duplicating the folder with Command + D ( PC is Ctrl +D). Now that the folder is duplicated, let’s name our project folder.
[Image]
For this process to work effectively, it’s imperative that both your folder and file names are consistent. In this example, we’re going to use the following nomenclature:
(ClientName - Year - ProjectType)
(McDonalds - 2023 - Social)
At this point, we’re about 50% complete. Let’s head over to Figma to set up the second half of our system. In Figma, in the main menu on the left side of the window, there’s a ‘+Create New Team’’ call to action (CTA). Create a new team and name it, ‘Client Work’. You have now created a workspace that mirrors your file structure in Google Drive.


In your ‘Client Work’ team, start a new project by selecting the ‘New Project’ CTA in the upper right corner of the window. You want to name that new project, ‘McDonalds - 2023 - Social’. Before we continue forward, let’s take a moment to explain what we’ve done so far:
Let’s imagine our client, McDonalds, requested four social graphics with each graphic being sized at 1200 x 1200. We’re going to create our graphics directly in Figma and export those directly to our ‘Renders’ folder for the client to access.
Let’s fast forward, we’ve created our graphics and now we need client approval. This is where the party starts. In the communication with the client, we’re going to share a link to our Figma file so the client can see the requested graphics as a graphical set. Reviewing the entire graphic set provides a more comprehensive understanding of the creative direction and allows for a more cohesive review process, resulting in smoother creative approvals.

Note: Be sure to adjust the Figma sharing permissions to ‘Anyone with the link can view’.
Because Figma is cloud-based, you can collect the client’s feedback directly in the design file and you can make real-time changes to improve revision time. Furthermore, you’re no longer using local device storage so you can have access to your design files anytime, any place.
Somewhere in your file, you want to create a button and name it ‘Download Files’:

Now that you’ve produced a button, it needs to link something right? Let’s head back over to Google Drive to retrieve our link.

Let’s head back into our ‘McDonalds - 2023 - Social’ folder to create a shareable link to our ‘Renders’ folder. To create a shareable link, right click the folder and select, ‘Share with Google Drive’. A pop-up window should appear and you want to make sure you adjust the permissions to, ‘Anyone with the link’. Now that we’ve been able to generate a link, let’s copy it and head back over to our Figma file.

Back in our Figma file, let’s find the button we created and add a hyperlink. You can add your hyperlink by selecting the text you’d like to link and clicking the chain icon in the global menu at the top of the window. You want to paste the Google Drive link to the ‘Renders’ folder in the hyperlink placement.
Boom! Just like that, you’ve created an efficient, cost- effective DAM that doesn’t require local storage and provides real time updates for you and your client. With its advanced features, easy-to-use interface, and robust security, the Figma-Google Drive combination is the ideal solution for businesses looking to get the most out of their digital platforms.
Comments